nettiefail_E

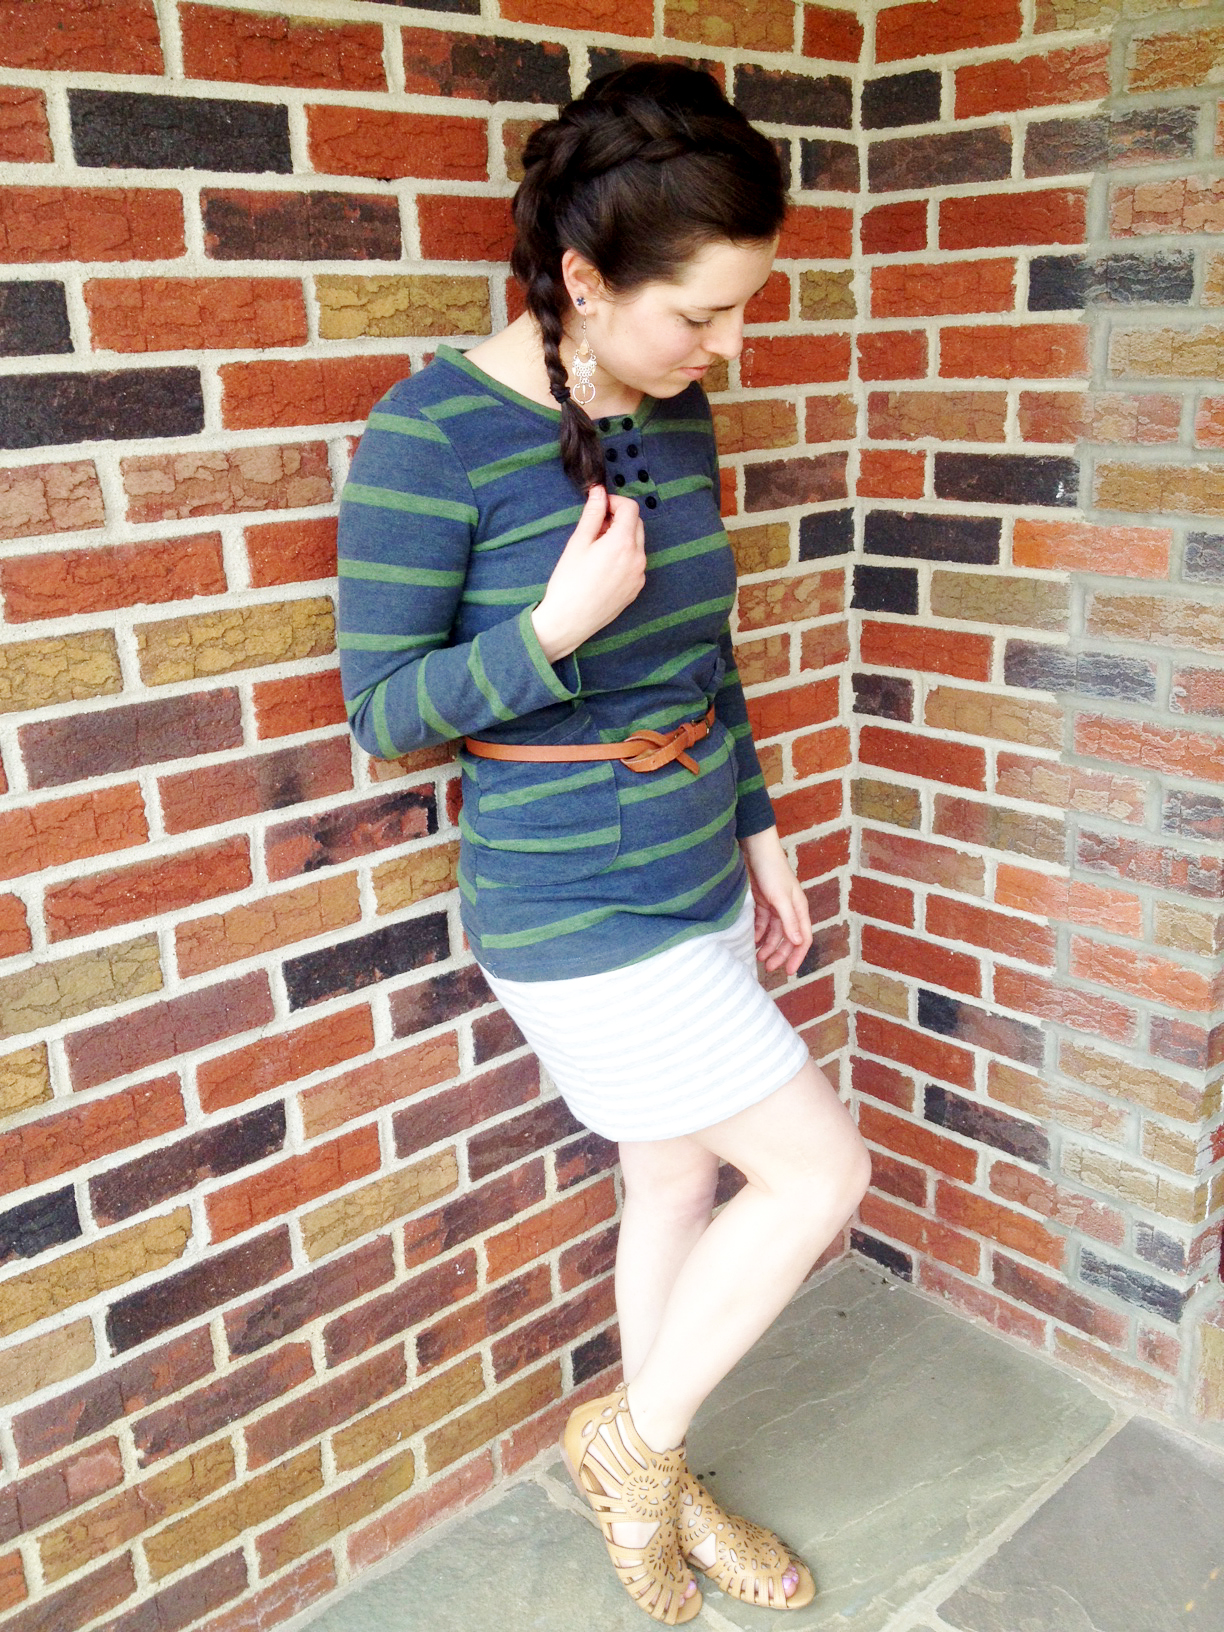
I have a confession to make: I am afraid of commercial patterns. Until I made the dress pictured above, I had not made a piece of clothing from a pattern (that I did not draft) since some epic tragedies in high school.  A conservative estimate is that I had not made anything except pajama pants from a pre-made pattern in 8 years.

But then Closet Case Files came out with the Nettie pattern, and I thought it might be a good first step back into the commercial pattern world. I am much more comfortable sewing with knits than with woven fabrics, and the pattern is pretty simple. It also fits one of the silhouettes I chose after working through Coletterie’s Wardrobe Architect series. It seemed like a perfect project.

So I made a Nettie this weekend. You may recognize the pattern– it has been all over the sewing blogs lately. I put it together in about an afternoon.

I made a size 12 with some extra space added to the shoulders (1″ on top) and the bust (1/2″ to each side). I also shortened the dress by 2″ at the “shorten/lengthen here” line

But it didn’t fit. Here’s why:

1) shoulders and bust- I had read that the Nettie runs tight in the shoulders. And I’ve got some serious shoulders for a short person (thank you swimming and rock climbing!). Even though I added extra space to the shoulders and bust, when I tried on the finished dress, the arms and bust were still too tight. I might have been able to fudge the fit, except for the next mistake:

2) stretch- I didn’t pick a knit fabric with enough stretch. This grey knit ponte barely had the 50% stretch recommended.

Only slightly daunted from this bump in the road, I resolve that next time I’ll do better.


E-Summer dress 2

Today I have a guest post for you (it’s also the 100th post on my blog)! This dress comes all the way from sunny Nevada, made by the talented Alisa of Go Ask Alisa. I was seriously impressed by her eye for color and fabric, so I reached out to her to inquire about her summer sewing projects. She sent me pictures of this gorgeous strapless mini dress. I’ll let her tell you about it. To read the tutorial on how to make this dress, click here.

“This is more of a party-summer dress. Made out of stretch knit and fine crepe, in real life it is combined from two colors: blush pink and beige cream. I tried to style it two ways, with jacket and without. I believe with jacket it looks a tiny bit more sophisticated. I must say I am not a strapless dress/gown person, neither am I a fan of mini-length. But I decided to try something  – and here we go.

E-Summer dress w jacket 3

The idea originated in a Burda sewing magazine, if I am not mistaken – a couple of years ago. There the dress was done in shades of grey and green.

E-Burda vs Me

The pattern is so incredibly easy, anyone can do this dress – you just need to be careful choosing fabric for it. The top part and middle part should be stretchy to hold the dress itself on the body. As for the fabric: this fabric is brought from United Kingdom and bought at Abakhan (that’s a very well known Russian fabric dealer shop), they have all sorts of fabrics that I have never even seen before!

Note from Claire: the tutorial for the dress can be found here.

E-Summer dress details 10

Clutch, by the way is also handmade by me.” Tutorial for a similar clutch can be found here.

E-Summer dress clutch 9


I’m impressed. Thanks so much for sharing! If you want to see more of Alisa, you can find her at GoAskAlisa.com, where she blogs about life, art, writing, and sewing. 

E-Summer dress w jacket 7


E-DSCN1805

Thrift stores seem to have an endless supply of dresses from the 1990’s. Wearing them is not so popular these days. So I assume that everyone who cleans out their closets gets rid of them, and they sit at goodwill… until… I find them. And transform them into something cute and totally wearable. I made this dress last year and it is one of my favorites.  It makes me feel like I could be sitting around sipping espresso in a French cafe.

Alas, no before picture. But here is how I did it.

All you need is one out of date wrap dress that is too long.

wrap dress modification


1. Hem the dress the length you want it.

2. Use the extra length to cut cap sleeves and bands to wind around the front straps. If you cut along the original hem, you won’t need to re-hem the sleeves.

3. Cinch the front straps and stitch them in place. Then sew on the cap sleeves. It is helpful to have a dress form or another pair of hands when pinning the sleeves in place (it is hard to pin behind your shoulder when you are wearing the dress). My savvy grandmother helped me with some of the pinning during a visit last year. You might need to hand sew the sleeves to the cinched part (I didn’t).

E-DSCN1834


4. If the sleeves stick out to the side too much, take out the excess fabric by putting a dart in the sleeve.

E-DSCN1832

Here’s the back of the dress (camera died so this is a low quality phone pic) and the side.


photo 4 E5

I also usually put a pin in the front to hold the wrap together over my boobs to make it a little more modest. Otherwise the wrap front of the dress would be too low. One modification I would make would be to add a button here instead of a pin.

As the French say, “fin.”

E-DSCN1833


dress // thrifted and altered :: moccasins // minnetonnka :: earrings // handmade


summer dress series header

Hey lovely followers!

I know I’ve gotten away from sewing and DIY posts lately, but I am about to remedy that. This spring and summer, I have a new series on my blog: the summer dress series! I’ve lined up some posts on dresses I have made and altered, as well as some guest posts. I just about live in dresses all summer. As soon as spring peeked its head over the horizon I was back to wearing dresses (albeit with leggings underneath). Look forward to a couple posts a month this spring and summer (maybe more, we’ll see how I keep up with it). I’m so excited to share these projects with you!

– Claire

P.S. If you have a dress you’ve made and want to see it featured on Hoopes Park Studios, send me an email with some pictures and a synopsis of how you made it at hoopesparkstudios [at] gmail [dot] com

Image sources (clockwise from top left): 1 / 2 / 3 / 4 / 5 / 6 / 7


E-photo7

Rachel from House of Pinhero hosted a nametag swap recently, and I decided to join. I was paired with Marilla, an amazing seamstress from the UK. The idea for the swap came from a fat quarter retreat she (Rachel) attended, where everyone had beautiful handmade name tags. There is a sewist meetup going on soon in the UK, but I will not be able to make it 😦 Fortunately, I did get to make and receive an awesome name tag!

photo 4 copy_A

First off, the nametag I made for Marilla: All this geography and travel stuff got me thinking about maps! So that is the theme I went with for her nametag. I used felt, fabric, printable cotton, an embroidery hoop, and thread (and needle). I also printed out a map of the UK from Google Maps.

I cut a square from the fabric and the UK shape from the felt. I carefully aligned England/Scotland and Ireland up and pinned them to the fabric square.

nametag 2 copy

Then I sewed the UK shapes on to the nametag with a blanket stitch using regular thread (the kind you use on a sewing machine). It looks so cute in the embroidery hoop! Makes me want to just leave it framed like that… mayhaps an idea for another project?

photo 1 copy

After that, I embroidered her name and a couple of stars over the felt map of the UK.

photo 5 copy_A

I also printed out some “Hoopes Park Studios” labels on the printable cotton and sewed one on the back of her nametag. The printable cotton I bought from Dharma trading. I think the price was really reasonable, and the product was easy to use. The instructions for printing on the fabric were clear and the labels turned out well. I have about 5 more sheets left over and I’m excited to see how color printing turns out.

I used some white and black animal print velvet for the back. I made sure to sandwich a loop of ribbon between the front and back pieces of the nametag so I could hang it.

photo 3 copy

Next, the “nametag” from Marilla (which is the best part of this post).  It is actually a handkerchief.

E-photo8


A bit non traditional but still wonderful! It is super detailed and carefully stitched. She even sent it with this adorable card she made. With a robot!

E-photo9


Here’s a little detail of the spool and scissors:

E-hankiedetail

I love it! For more of Marilla and the stuff she sews, check her out here.


E-DSCN1712

My roommate made this quilt when she was in high school, so it is at least 20 years old. That the quilt is made of solid colors, rather than patterns, makes it one of the most unique quilts I’ve ever seen. She once told me her inspiration for the solid colors came from quilts made by the Amish in Lancaster. It hangs on our living room wall and its vibrancy is a focal point for the whole first floor of the house.

E-DSCN1717

E-DSCN1715

up close and personal

Also, this skirt!  The pattern on the lace is so pretty! It is one of a select few midi skirts that doesn’t make my legs look stubby. Another plus is that it is decently easy to bike in for a body con skirt. It is a couple years old but has held up well.

E-details

E-DSCN1711

E-DSCN1730

wearing two sets of dangly earrings, as usual.

I have finally upgraded to a point and shoot from my ipad, but I am itching to get my hands on a DSLR. I borrowed my sister’s tripod, which has drastically expanded my picture taking capabilities. Blogging has really peaked my interest in photography.

I’ll leave you with a detail of this fantastic quilt.

E-DSCN1719

top // thrifted :: skirt // TJMaxx :: earrings // old

 (I’m standing on a bench in front of the quilt in case you thought the floor looked weird).

I first read an article about Elle Muliarchyk in the New York Times in 2006. I had just started my junior year of high school and was still in that gawky, awkward phase of my earlier youth. In those years I would trip over my feet, bury my nose in science fiction, and dream about my creative vision (which I was too self-conscious to share with the world). It was in the midst of this stage that I came across this photograph (above) by Elle Muliarchyk.

The New York Times called her work “Pretty Larceny”. The article states, ” Elle Muliarchyk is an artist, and what she steals are fashion moments.” She explores “that highly ambivalent space, the dressing room… a space that’s not public but not exactly private, either. Here, we strip both physically and emotionally, trying on clothes as well as personae. And while we hope for a metamorphosis — into someone thinner, sexier, richer, different — harsh lighting and awkward angles too often force us to confront the nauseous schism between fantasy and reality.”

I found these images at once seductive and rebellious. Awkward teenage Claire wanted to grow up to be just like this woman who had the courage to snap pictures of herself in dressing rooms. I wanted to try on a new self, once that included a heck of a lot more confidence and creativity.

When the article recounted her guerilla adventures, being discovered by sales clerks, even being kicked out of boutiques for taking pictures, I swooned over her bravery and beauty. I ripped the article out and saved it. I still have it.

It has taken many years (seven, to be specific) for me to work up the confidence to photograph myself for artistic and stylistic purposes. I still often feel the urge to blend in.  Muliarchyk was one of the first people to inspire me. Her work encouraged me to take the creative path I find myself on now.

I went searching for her online when I decided to write this post- I found her blog here. She is still taking amazing photographs.

E-DSCN1776

Today we rode our bikes up to the growers’ market to buy eggs and produce. It is so nice to have a farmers’ market so close by! One of my favorite food is collard greens, and we bought a whole big bunch. I miss being in one place long enough to have a garden. One of these days I’ll settle down and get back to gardening. Fresh produce from the market is the next best thing to my own garden.

Collard greens

Remove the stems from a bunch of collard greens and chop them up. Stir fry them on medium-low heat with about 1 T olive oil, 1 T soy sauce, a few shakes of liquid smoke, 2 cloves of crushed garlic and 2 T vegetable stock.


E-DSCN1783

There were also some delicious looking pastries and bread for sale.

E-DSCN1790

E-DSCN1782E-DSCN1792


And look! The trees are blooming. Lovely.

E-11

In my last post I said I couldn’t do as much cool braiding stuff with my hair now that I have an undercut. Then I thought, “Boo. You can still do lots of cool stuff with your hair, Claire.”  I tried this tutorial from Twist Me Pretty (minus the extensions) and it worked out really well.

I wore my hair down almost this entire winter, mainly to keep my next warm. But now it is warming up and I can wear braids again!

E-45

So the braid is the only DIY thing in this post. But it is still awesome! Also all the layers (sweatshirt over dress) have done their job keeping me warm but not too warm while the weather is indecisive about temperature. It is SO nice to finally be through this long, harsh winter.

E-29


jewelry // handmade :: dress / belt / sweatshirt // thrifted :: shoes // Shoemint

“Springtime is the land awakening.  The March winds are the morning yawn.”  –Kathy Sue Loudermilk, I Love You